


























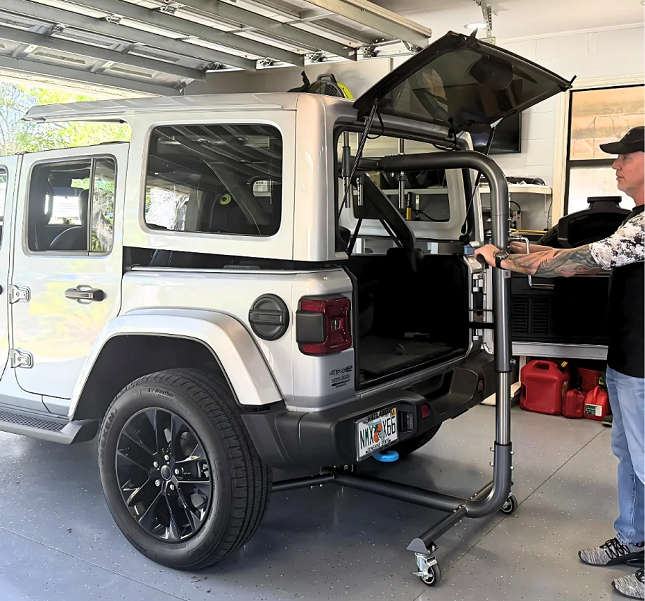
The process of removing a Bronco hardtop may prove challenging when the hardtop is heavy, the fasteners are difficult to access, and you lack the space to lift it safely. It is not merely a matter of loosening bolts, as the wiring, panels, lifting, and storage require consideration too. You can strain yourself unnecessarily or scratch the car or even damage the hard top without a clear way of doing this.
The most effective method is to get the appropriate tools ready and use a controlled removal method. It is simpler to handle every aspect of the work process by breaking it down into easy steps. The right equipment can also reduce the amount of manual lifting required.
Some practical tools and techniques can simplify the process of Bronco hard top removal. Here are six key tips to follow.
1) Use Essential Hand Tools and a Proper Removal Technique
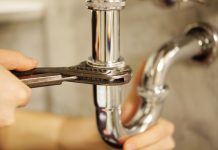
Prior to beginning your Bronco hardtop removal, assemble the simple hand tools you will require and keep them at hand. A socket wrench and the appropriate Torx bit are useful for removing the hard top fasteners.
A small container or labeled bags should also be available to store the bolts and hardware. It is always good to keep every piece of the article in order so that it can be reassembled easily in the future.
Secondly, place the Bronco on a flat, stable surface where there is ample space to move around the vehicle. Ensure that the space is free of any objects that may disrupt the hard top or lifting equipment. Before starting, review the steps of removal. This is necessary to avoid excessive movement after the hard top has been partially removed.
Another thing is that it is advisable to examine the lift or support equipment prior to placing it close to the vehicle. Ensure that it is properly assembled and in a position where it supports the top evenly.
2) Choose The Right Socket Tools for Hard Top Bolts
The hard top fasteners need the correct socket tool so you can loosen them without unnecessary force. A suitable socket wrench and T40 Torx bit are commonly used for Bronco hard top bolts.
Before applying pressure, make sure the bit is seated fully in the fastener. This reduces the chance of slipping or damaging the bolt head.
Work methodically rather than rushing through each fastener. Loosen the bolts while the hard top remains supported, then remove them completely when you are ready to lift the top. Keeping the hardware together also prevents misplaced pieces.
Tool condition matters as well. A worn or poorly fitting bit can make the job harder. Therefore, check the tool before starting and replace anything that does not fit securely.
3) Follow The Correct Sequence When Removing Hard Top Fasteners
Removing fasteners in a controlled sequence helps keep the hard top stable during the process. First, remove the freedom panels to reduce the weight you need to manage. Then disconnect the relevant wire harnesses and vent connections before attempting to lift the main hard top.
After those connections are clear, loosen the remaining hard top fasteners. It is better to loosen them before removing them completely. This approach keeps the top secured while you prepare the lifting equipment.
Once every connection and fastener has been checked, remove the bolts completely. Do not begin moving the hard top until you have confirmed that nothing remains attached. A final inspection around the edges and connection points can help catch a missed fastener or cable.
4) Use A Hard Top Lift and Controlled Lifting Technique
A hard top is heavy enough that manually lifting it can create unnecessary strain. A dedicated hard top lift can provide a more controlled way to raise and support the top. Freestanding systems can also be useful when a ceiling-mounted setup is not practical.
Position the lift correctly before raising the hard top. The support platform should sit beneath the top and provide even contact. Once the fasteners and connections are removed, engage the lifting mechanism gradually rather than making a sudden movement.
Watch the top as it separates from the Bronco. Check that it remains balanced and that no part of the vehicle is being contacted. Controlled movement is especially important when working alone because you have less ability to correct the top once it begins shifting.
5) Apply Proper Handling Techniques to Prevent Strain or Damage
Even with lifting equipment, careful handling remains important. Keep the area around the Bronco clear before moving the supported hard top. This gives you enough space to reposition the equipment without bumping the vehicle or nearby objects.
Move slowly when rolling or repositioning a supported hard top. Avoid sudden turns or movements that could make the top shift on its support. If the lift allows height adjustment, set it according to the vehicle and the space where the hard top will be stored.
You should also pay attention to painted surfaces and contact points. A padded support platform can help keep the hard top supported without relying on straps or direct contact with hard metal components. Before moving away from the vehicle, confirm that the top is stable and fully supported.
6) Use Suitable Storage Tools and Techniques After Removal
Removal is only one part of the job. You also need a safe and practical place to keep the hard top until it is time to reinstall it.
A storage system that supports the top above the hood can reduce the amount of floor space required in a garage. Portable systems can also make storage more flexible when the top needs to be removed away from home.
Before placing the hard top in its storage position, check that the support surface is ready and correctly aligned. Keep the top stable while moving it into position, and avoid placing loose tools or other objects underneath it.
Think about the next removal as well. Store the bolts, panels, and related hardware in an organized location. Keeping everything together can save time when you reinstall the hard top. A consistent storage routine also makes future removals easier to manage.
Conclusion
Bronco hard top removal becomes more manageable when you treat it as a step-by-step process rather than a single lifting task. Start by preparing the right hand tools, then remove the panels, connections, and fasteners in an organized sequence.
From there, use controlled lifting and careful handling to keep the hard top stable. Finally, give equal attention to storage so the top remains supported and protected between uses.
By combining suitable tools with practical techniques, you can make each removal more organized, reduce unnecessary strain, and create a smoother process for future open-air driving.